Have you never picked up a brush, but want to be a painter? This is an absolute beginner’s guide for how to start painting as a hobby. We will take you step-by-step from a blank canvs (or no canvas) to your first masterpiece. Also sprinkled in are links to what we believe are some of the better painting resources on the world wide web.
- Gather your supplies
- Setup a place to paint
- Decide what to paint
- Sketch an outline of your painting
- Time to paint
- Clean up
- Enjoy
1. Gather your supplies
Painting is a great hobby for the budget conscious. You only need a few things to get started and you are only limited by your imagination
- Paint
- Something to paint on
- Easel
- Palette
- Brushes
- Water
- Clothing
Paint
There are 3 main types of paint to choose from: acrylic, watercolor, and oil. For the beginner, we are recommending acrylic paint. Acrylic paint has the advantages of being activated by water, drying quickly, and once dry can be painted over. Oil paints require a solvent or paint thinner to use. This allows for a larger range of drying times and techniques but has a steeper learning curve. Oil paints are also tougher to clean up. Watercolors are activated by water similar to acrylics but have a much steeper learning curve. Watercolor paint does not dry hard to be painted over. Instead, it is reactivated with each new brush stroke which is less forgiving for the beginner.
Once you choose your paint type you’ll need to grab a few colors. A starter pack will probably include a yellow, red, blue, and maybe a white or brown. This will cover most of your bases. For a more comprehensive guide covering paint selection, Will Kemp put together a great guide here.
Something to paint on
You can’t go wrong with a canvas pre-primed for acrylic paint, but you can paint on anything your paint will stick to. Wood, metal, plant leaves, the sky is the limit. We won’t judge.
Easel
We recommend something to hold up your painting medium instead of laying it flat. This will help with lighting, perspective, and making sure your paint doesn’t glob up. Easels are also pretty affordable even for a starving artist. If you are really starving though, you can always skip this.
Palette
You need something to mix your paints on. This can be a paper plate. Honestly, they work great and make cleanup a breeze. If an artist’s palette with a thumb hole and divots for mixing paint makes you feel more legit, go for it. Hobbies are for enjoying your precious free time.
Brushes
A variety of brush sizes and shapes will help achieve different strokes and effects. This is another place where you can’t go wrong with a starter pack. It will probably have everything you need. Thick brushes for painting large areas and filling in the background. Medium workhorse brushes. Very thin brushes for detailed work. Maybe some fan-shaped brushes you aren’t sure what they are for (great for laying down trees on a landscape).
For acrylic paints, you’ll probably want to stick to synthetic brushes. Acrylic paint will damage natural brushes and no one wants to be picking bristles out of their paintings.
Water
You’ll need water both for painting and for cleanup. This can be as simple as a couple of red solo cups. While painting a spray bottle can help you keep your palette moist and your paint activated but isn’t necessary. A wet rag or paper towel can also be used to dab up happy little mistakes on your painting. When it comes to cleanup you’ll need a fresh cup to rinse out your brushes. Never let paint dry on your brushes.
Clothing
You may want to wear old clothing or maybe an apron. Nothing special is required here.
2. Set up a place to paint
We think that you start painting is more important than where you are painting. Choosing a place to paint shouldn’t deter you from getting going, art can be made in all settings. That said, below are a couple of things to keep in mind.
You don’t need a lot of space
When you think of an art studio the first thing that comes to mind might be a dedicated room with bay windows overlooking a beautiful vista full of inspiration. The truth is none of this is necessary and not having the perfect place to paint shouldn’t stop you from getting started. All you need is enough space to set up your easel, lay out your paints, your brushes, and a few cups of water. If you need inspiration for setting up a studio in a small area we think this article by Anna Mason has put together a great guide here.
Lighting
When setting up your area to paint it is worth keeping in mind how your canvas will be lit up. For the beginner, it’ll make things easier if your canvas is lit consistently in a similar light to how you will display it. You’ll also want to avoid setting up in such a way that you are constantly casting shadows on your canvas. If you are setting up a studio from scratch we think it is tough to beat a couple of LED lights. If you are choosing a room with a window it is worth knowing that a North facing window will have the most consistent lighting if you live in the Northern hemisphere.
The setup
Once you’ve chosen a place to paint it is time to set up. This is as simple as setting up your easel on your chosen work surface (or just setting it up if you are choosing a standing easel), laying out your materials, and deciding it is time to paint.
3. Decide what to paint
Now that you have your supplies and are all set up what are you going to paint? The truth is whatever you want. Fruit, landscapes, and flowers are enjoyable projects. If you are looking for inspiration Painting to Gogh has put together some great beginner-friendly paintings that I’d be proud to display here. It doesn’t have to be too serious, canvases are hanging in art museums that are painted solid blue. Maybe toss in a white line and sell for millions? Don’t think it could happen? Check this out.
4. Sketch an outline of your painting
Now that you have decided what you are going to paint we recommend you sketch an outline onto your canvas in pencil. You’ll be painting over this, so you don’t need to spend a ton of time making it perfect. You can also trace something if you like. There is a great set of traceable templates found here. If you are reading this saying to yourself “I’m here to become a painter, not a sketch artist” skip this step and freehand it.
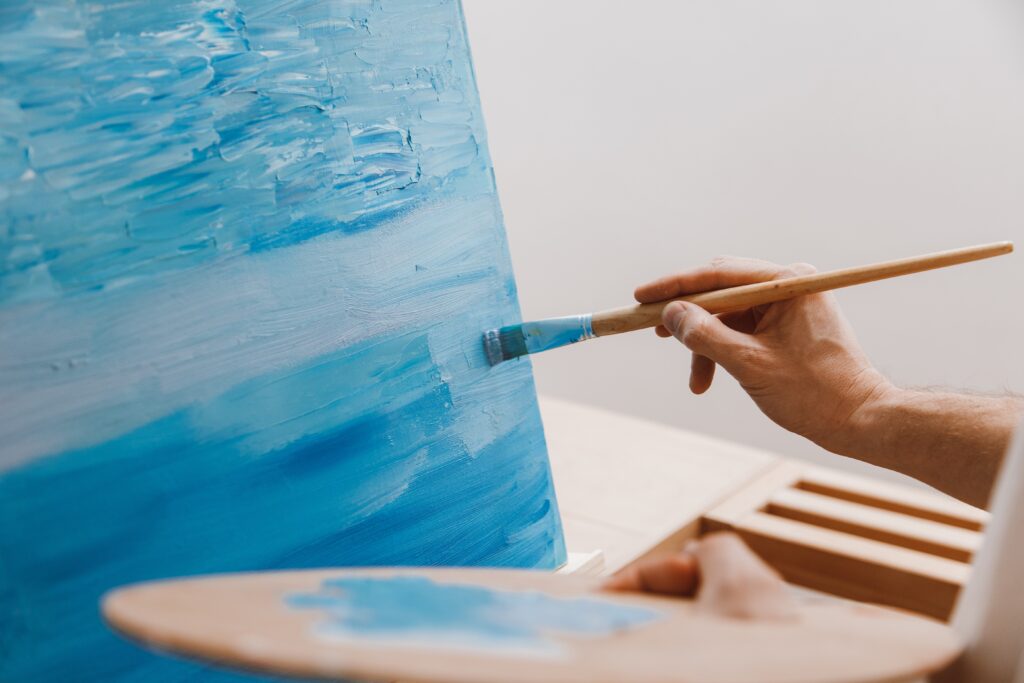
5. Time to paint
Ok, finally. Time to paint.
First, start with the background. Even if you want to your background to be the same color as your medium, white if you are painting on canvas, you should paint it that color. It will give you a much more polished finished painting. Most artists will paint the entire canvas a color to set the tone and then resketch their outline and paint on top of that first layer. This is called underpainting which removes the glare from the canvas and adds tone to your painting.
Once you have your background laid down you can start painting your subject. Add layers of paint to create your masterpiece. Get used to mixing your paints to create the colors you want and slowly add details. Practice will make perfect for creating the effect you want. If you are looking for some help learning brush strokes Pamela Groppe has a pretty good guide here.
Stop painting! This step is as important as anything else here and one of the hardest things to learn.
6. Clean up
You did it! You are now a painter, or at least have made a painting. Before we hang our masterpiece prominently in the entryway it is time for a little cleanup. Rinse out your brushes first. If the paint dries on your brushes it will ruin them. Now the only thing left to clean up is a few cups of rinse water. Don’t pour this down the drain! Dry acrylic paint is non-toxic and landfill-safe, but wet paint is toxic. If poured down a drain it can get into waterways. If you are using disposable cups the easiest thing to do is to wait for the rinse water to evaporate and then toss them. You can also pour the rinse water through a coffee filter and throw the coffee filter away.
7. Enjoy your new hobby
Painting can take a lifetime to master. There is a ton to learn and I hope we helped you get started. If you make a painting you are especially proud of we would love to see a pic on our contact page!